Nanoleaf - MVP pt. 2
.gif)
Materials
- Arduino Uno
- LED Strips
- 3D Printer
- 10Ω Resistor
- Acrylic (semi-transparent)
- LED Connectors
Introduction
I am continuing to build on my MVP from last week, this time fleshing out the proof of concept of having the panels connected to each other (and this having the LEDs connect to each other).
The Process
I started by laser cutting the white semi-transparent acrylic to fit into the black triangle walls I had (tediously) printed over the past couple of weeks. I designed the shape of the acrylic panels in Fusion.
Download the acrylic triangle file here!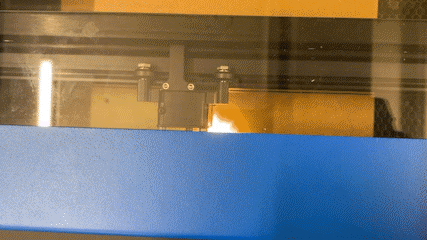
From here, I got to work putting the acrylic into the walls. The fit was pretty tight, so I opted not to use glue.
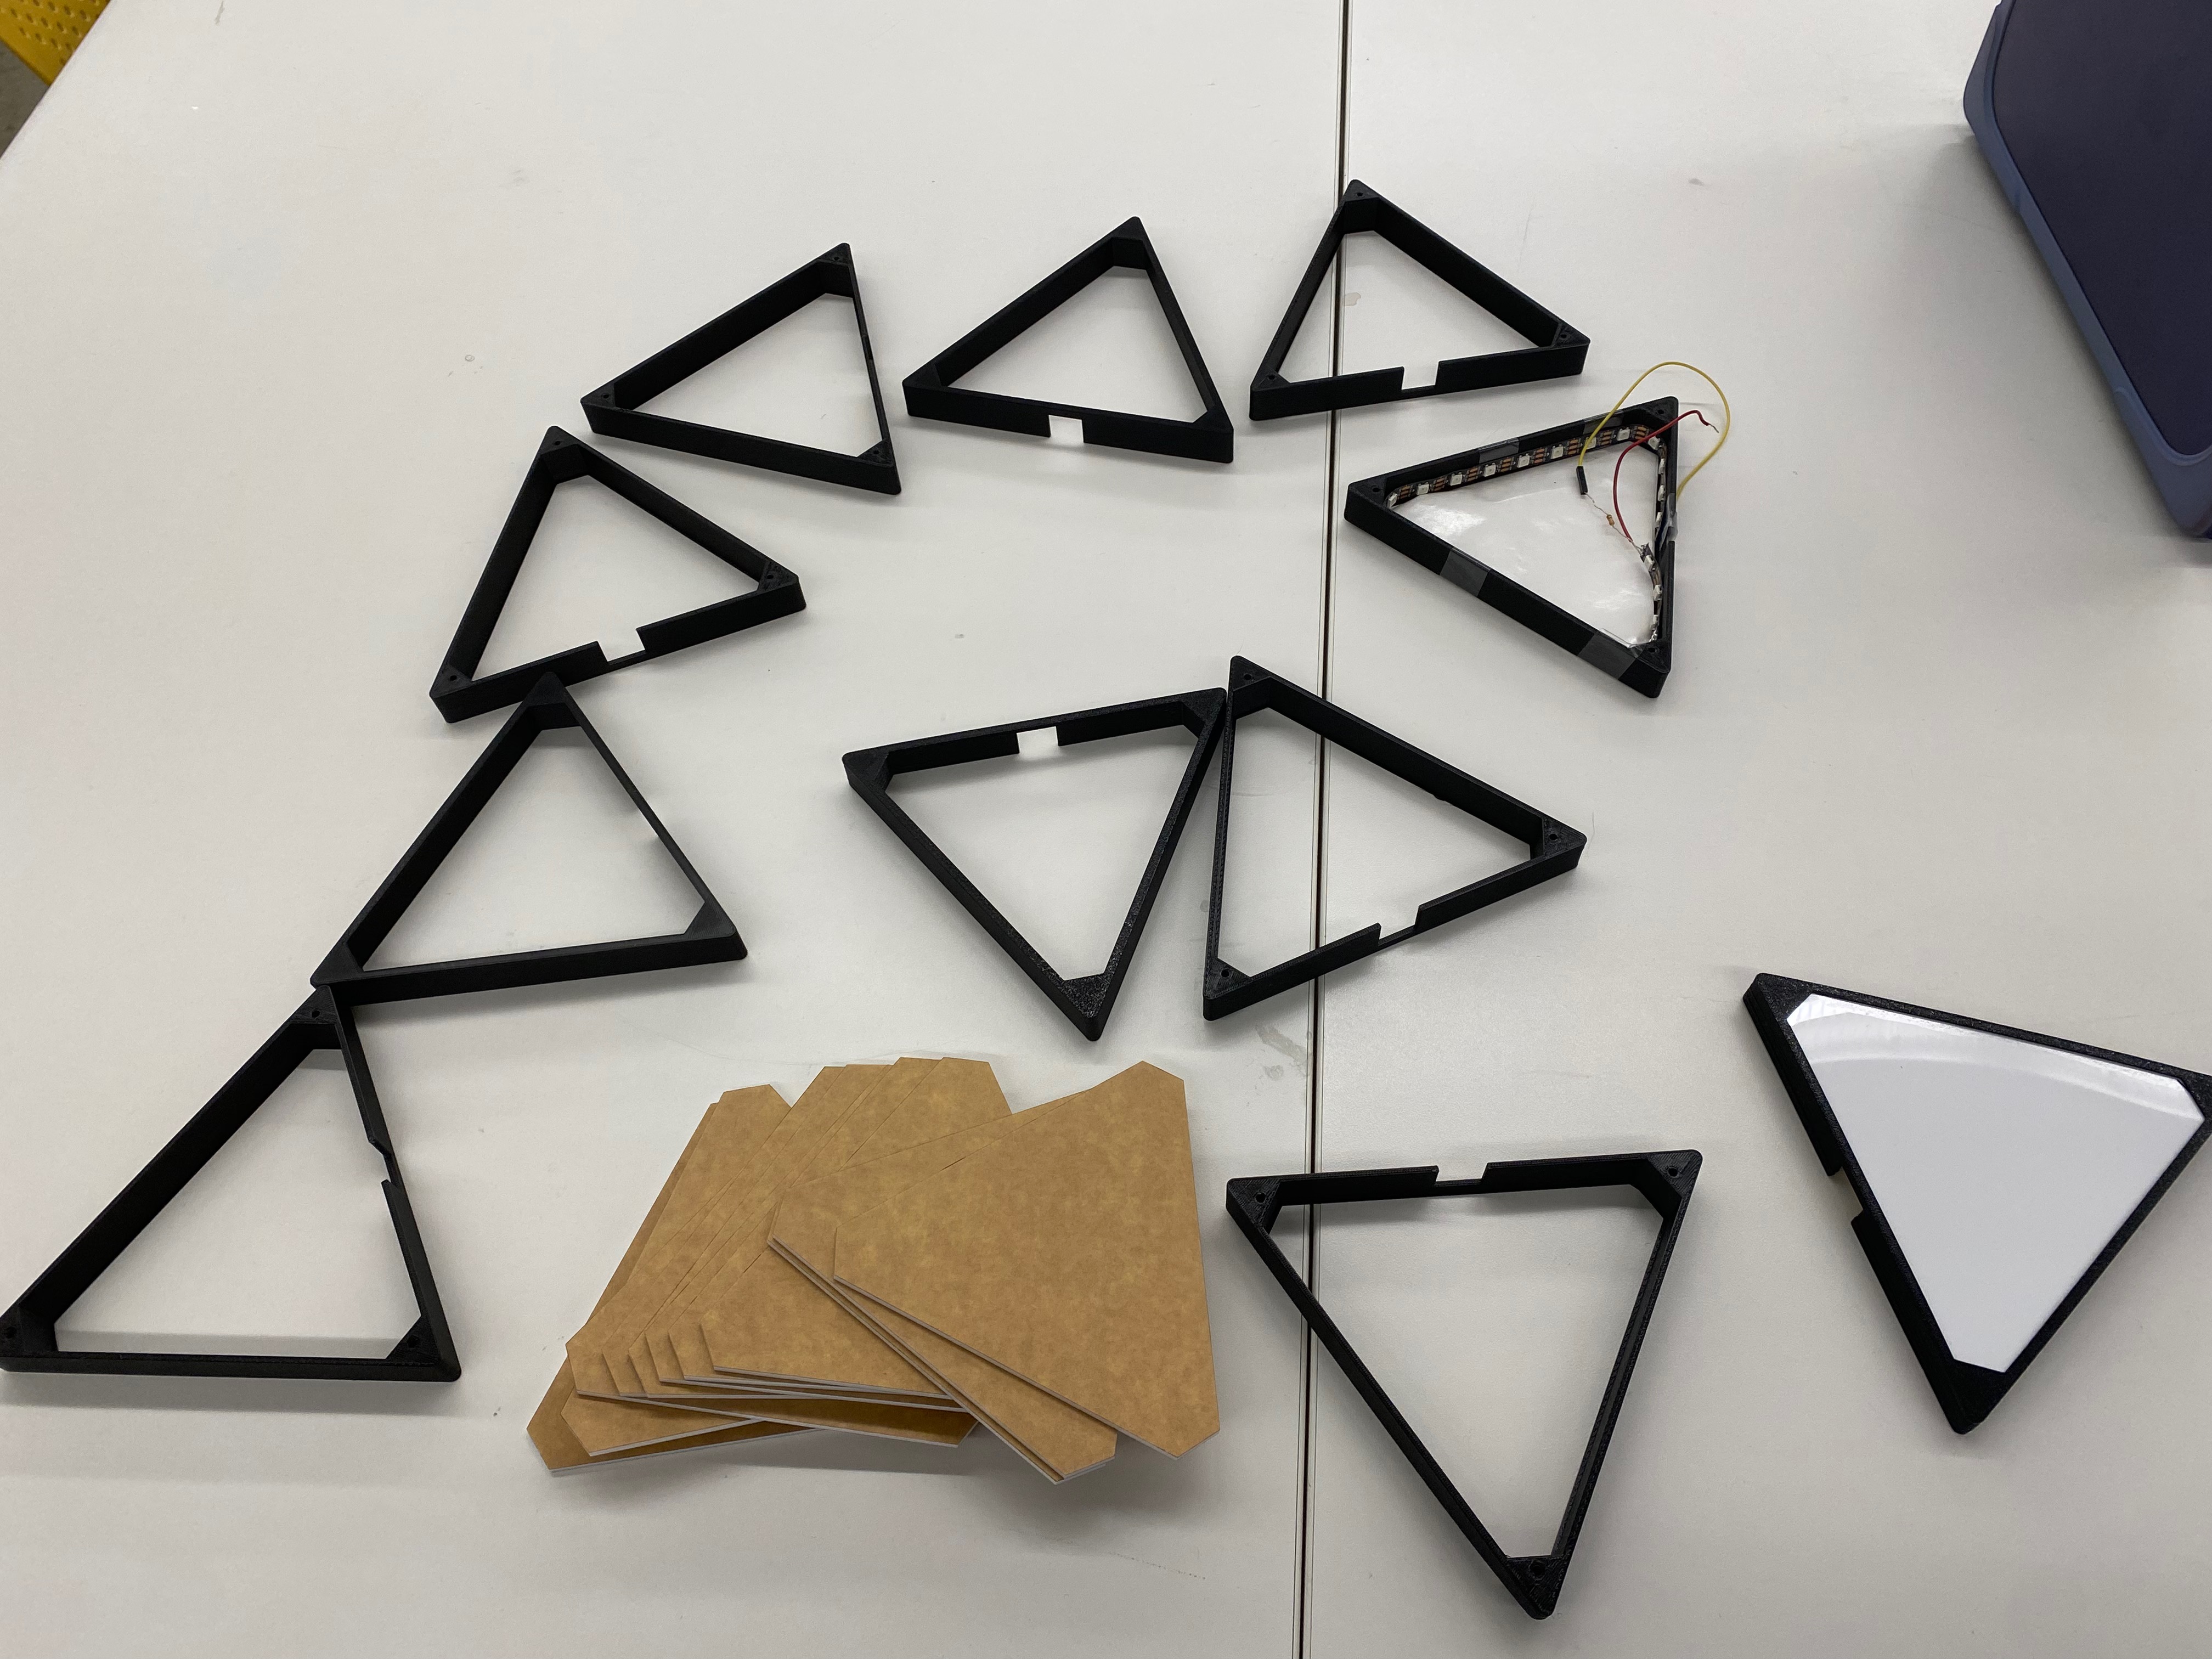
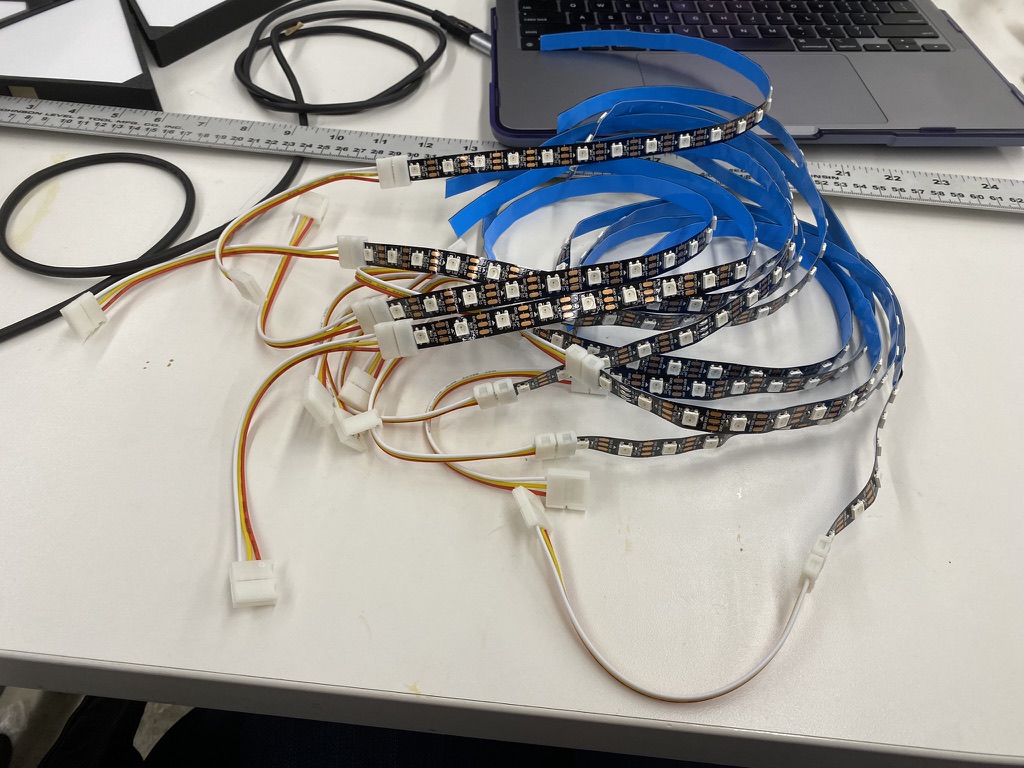
From here, I got to work cutting the LED strips--40cm each for each of the 12 triangles. I also connected these strips to LED connectors (so I did not have to solder a billion wires (: )
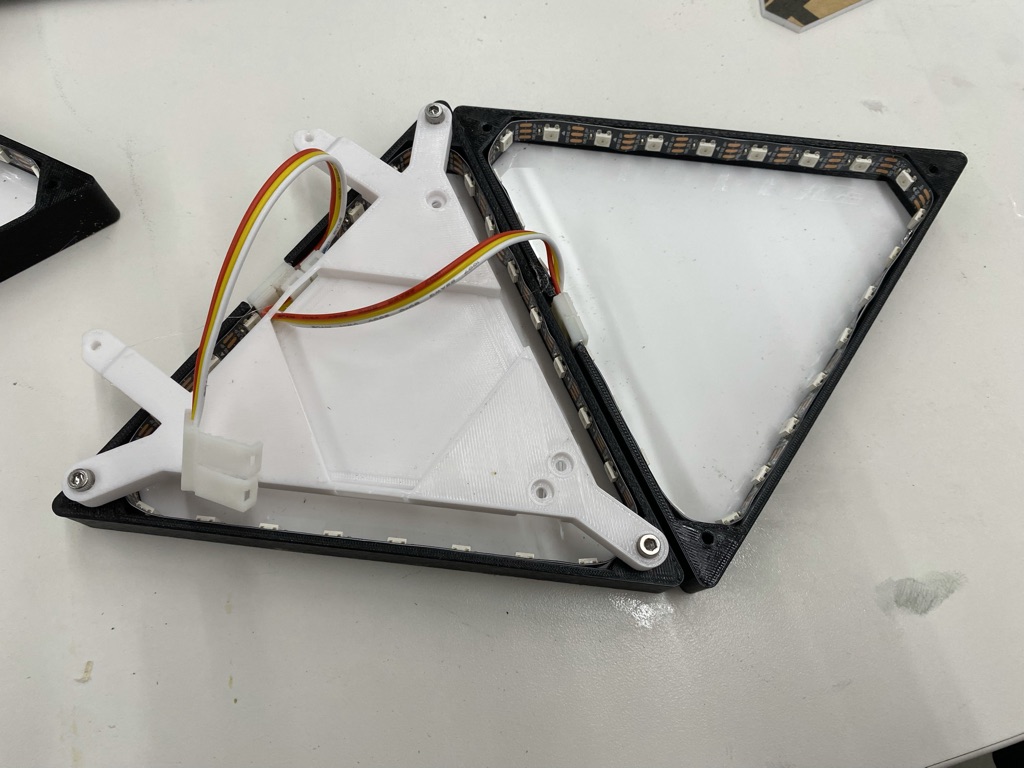
I then attached the white base to one of the triangle walls. I would have done more but I was quite tired by this point (:
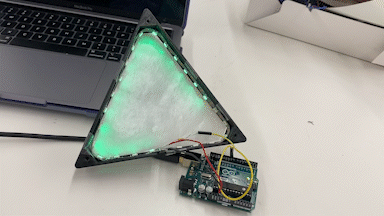
I used the same code from last week for the LEDs, so I will not add that here again (just scroll down!) Please see the gif above for the (semi-complete) product for this week.
Nanoleaf (MVP pt. 1)
Materials
- Arduino Uno
- LED Strips
- 3D Printer
- 10Ω Resistor
- Parchment Paper
Introduction
I really wanted to create a cool looking piece, that was more art-like than practical in nature. My room is full of art and posters, and I thought introducing something that integrates light in some capacity would be a cool touch. I've wanted to purchase one of these Nanoleaf panels in the past, but they go for hundreds of dollars. Luckily for me, I take Nathan's PS70 course, and now I have the skills to make it myself (hopefully).
The Process
For this project, I started by following an Instructables tutorial, and used the .stl files that were already created to print out the triangle walls and bases for the project. The walls were printed in black because I thought this would look good aeshetically, and the bases will be printed in white for practical reasons (the white is better able to diffuse light from the LED strips)!
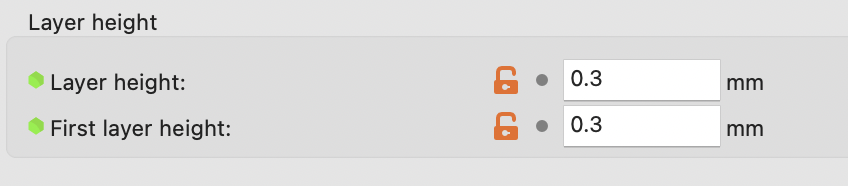
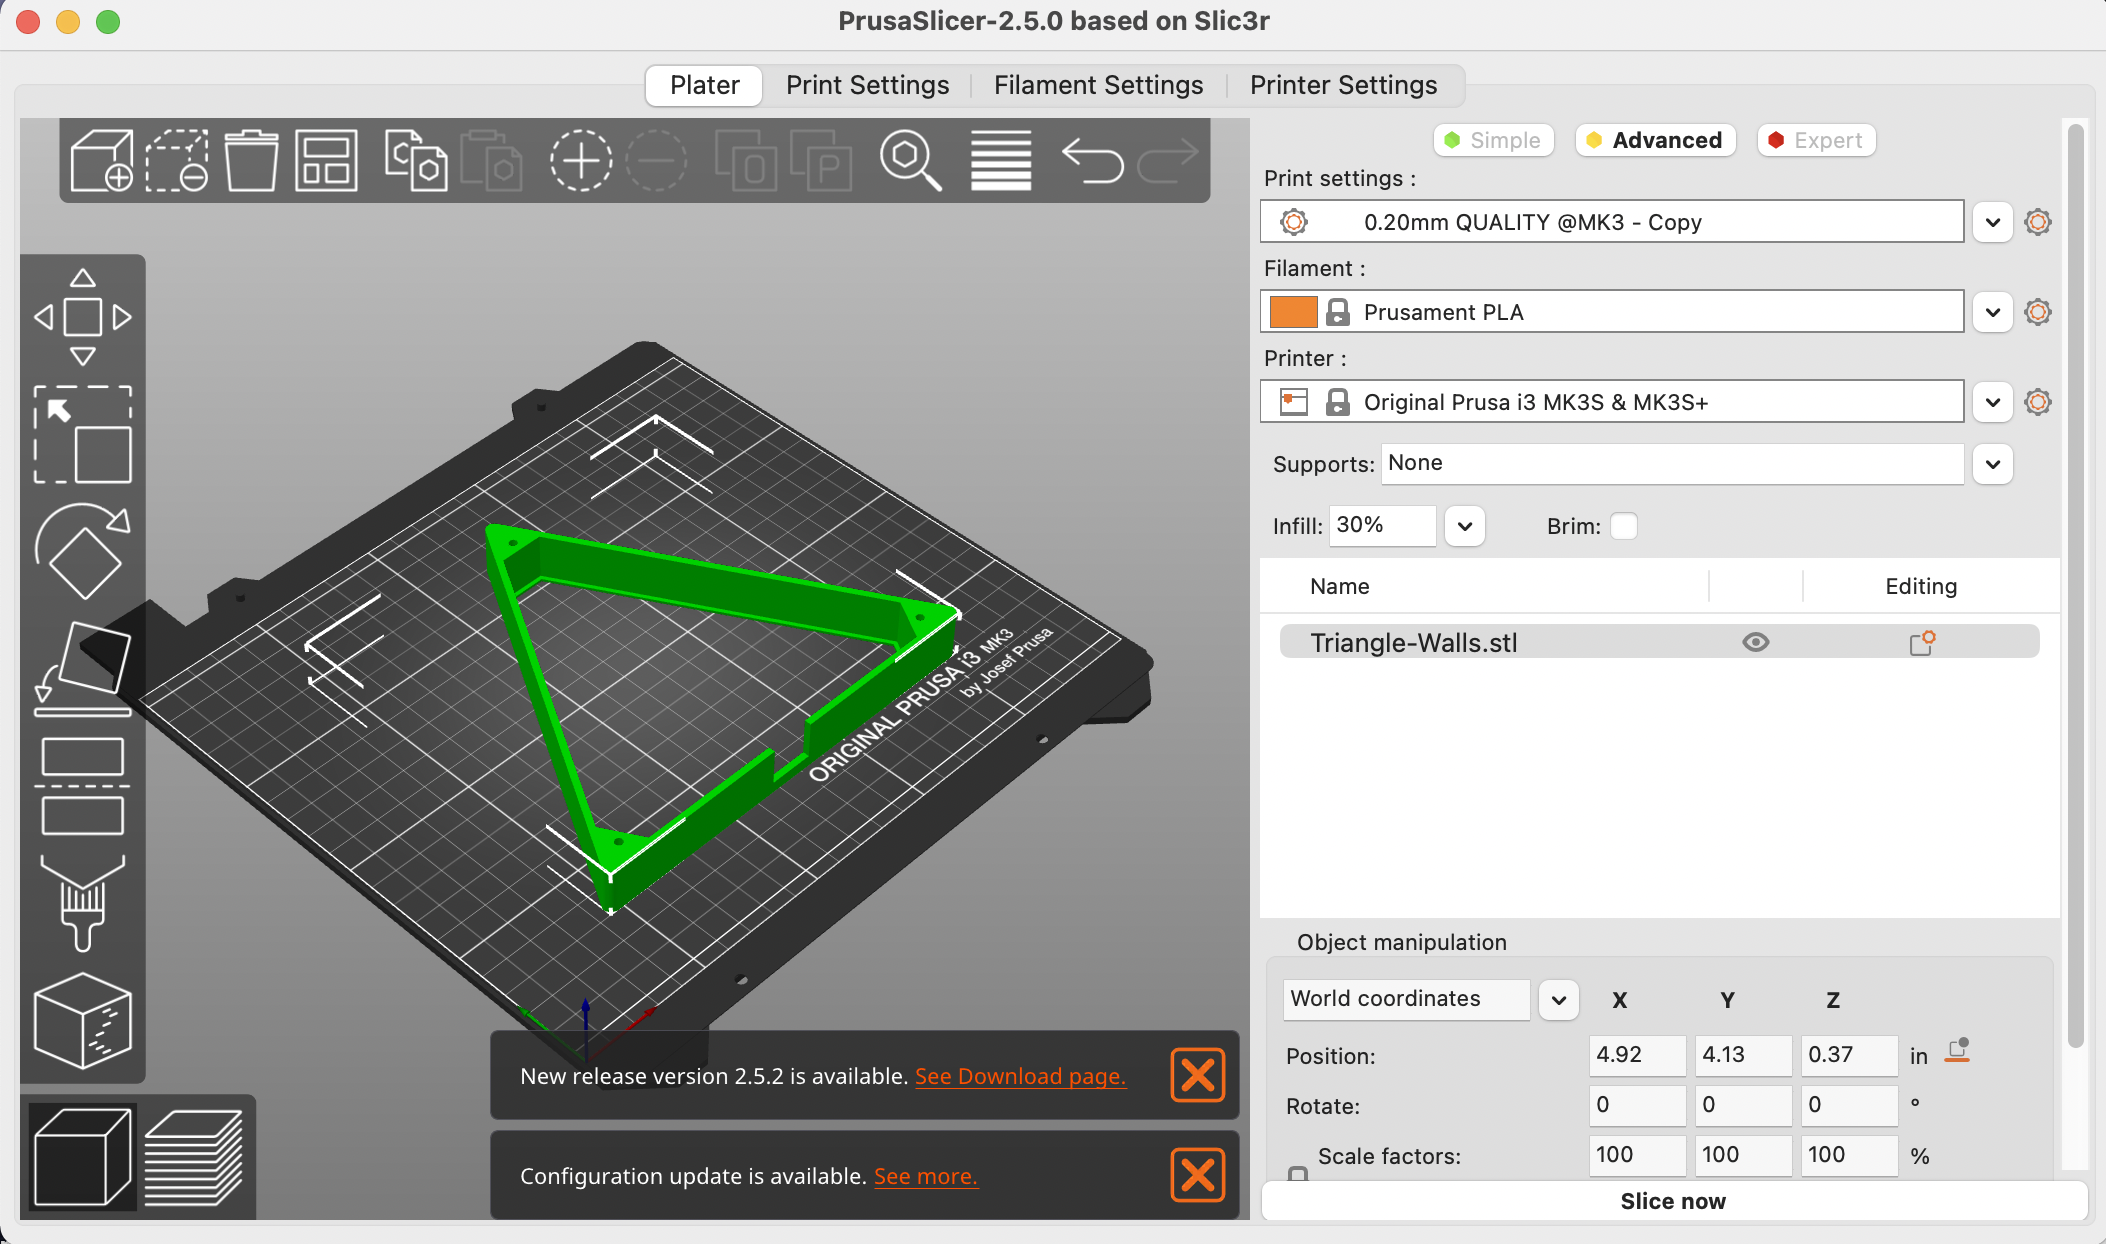
Download the triangle walls file here! Download the triangle base file here!I also had to change some settings within Prusa to ensure the prints were smooth. This included changing the layer height to 0.3mm and the infill to 30%.
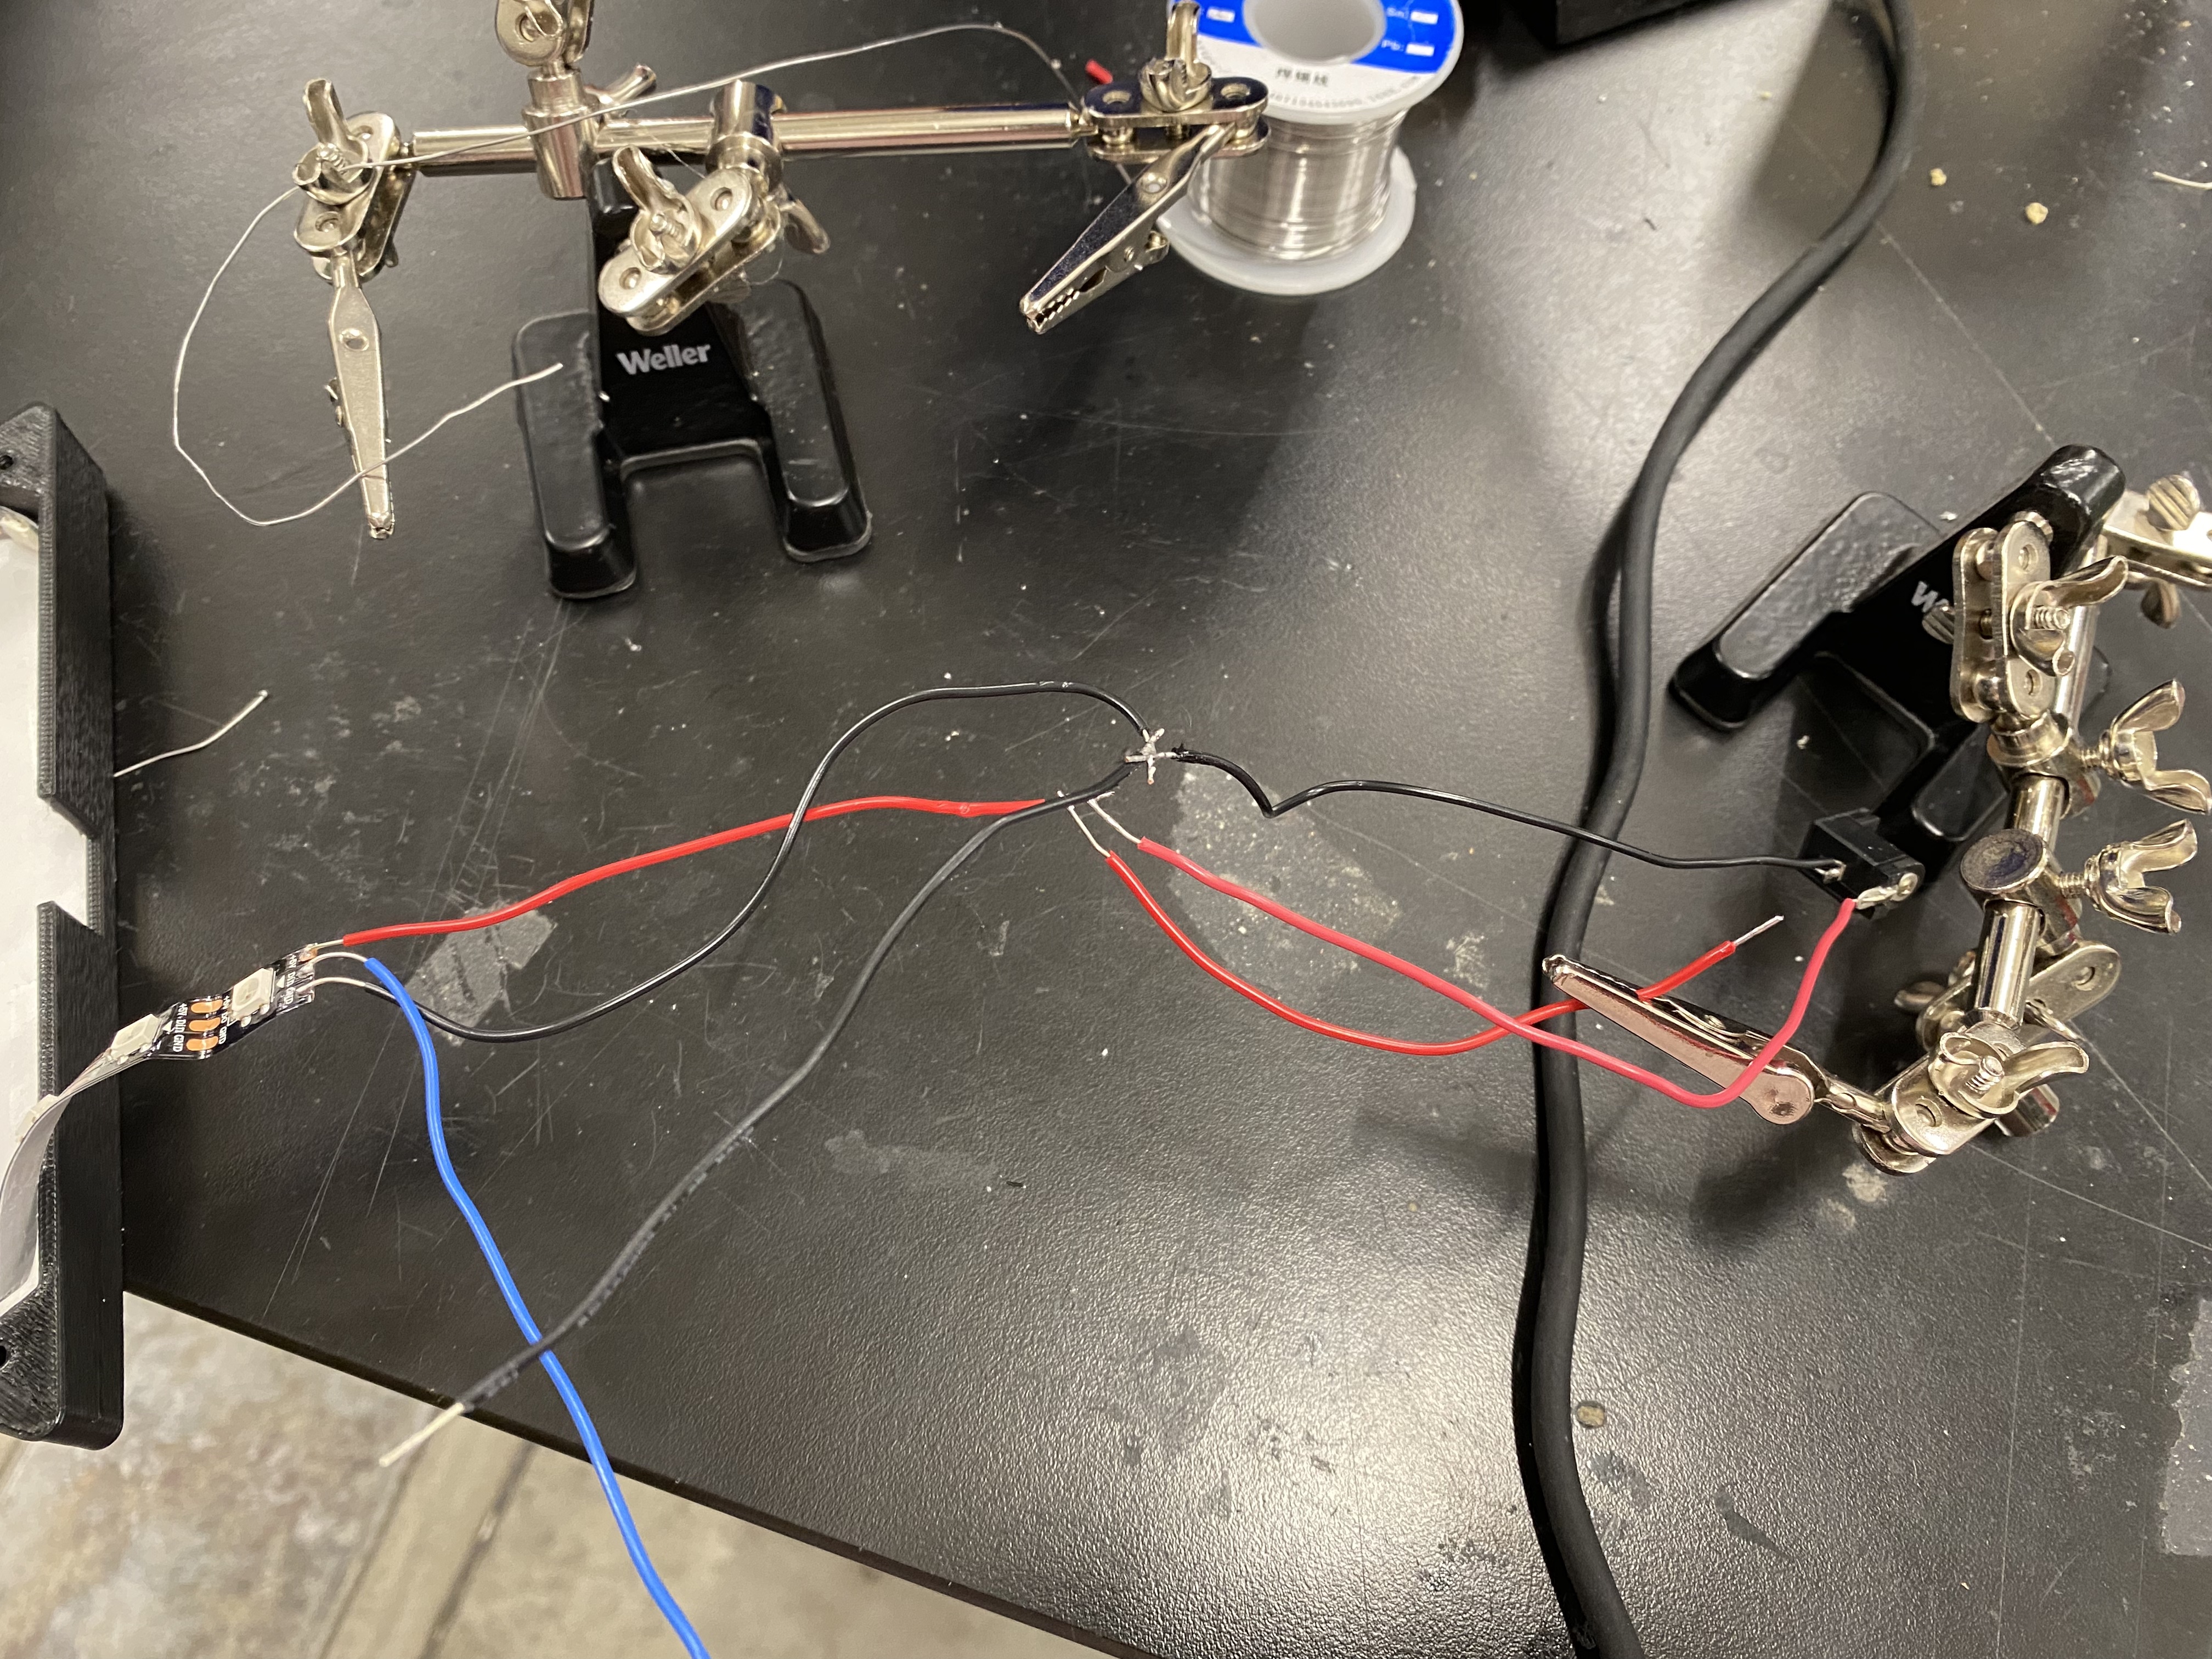
From here, I soldered the necessary wires to the 5V, din, and ground parts of the LED strips. I also did additional soldering to the port for power. This arrangement ended up not working for the MVP (for example, instead of the blue wire below, I replace this with a 10Ω Resistor in the next iteration), so I had to pivot to doing a more simple example which is pictured in the first gif on this page.
I then turned to using Nathan's code, and an to control the LED strip.
                    #include

                      #define PIN        9
                      #define NUMPIXELS 24
                      #define DELAYVAL 500 // Time (in milliseconds) to pause between pixels

                      Adafruit_NeoPixel strip(NUMPIXELS, PIN, NEO_GRB + NEO_KHZ800);

                      void setup() {
                        strip.begin(); // INITIALIZE NeoPixel strip object (REQUIRED)
                        strip.show();            // Turn OFF all pixels ASAP
                        strip.setBrightness(10); // Set BRIGHTNESS low to reduce draw (max = 255)
                      }

                      void loop() {
                        strip.clear(); // Set all pixel colors to 'off'

                        // The first NeoPixel in a strand is #0, second is 1, all the way up
                        // to the count of pixels minus one.
                        for(int i=0; i < NUMPIXELS; i++) {
                          // strip.Color() takes RGB values, from 0,0,0 up to 255,255,255
                          // Here we're using a moderately bright green color:
                          strip.setPixelColor(i, strip.Color(0, 150, 0));

                          strip.show();   // Send the updated pixel colors to the hardware.

                          delay(DELAYVAL); // Pause before next pass through loop
                        }
                      }
From here, I put everything together, and used an Arduino Uno as the microcontroller. I had tried to use an ESP32 Xiao, but this was a little bit of a nightmare. After several hours, Kassia figured out how, and I will implement this in the next iteration of the project. Feel free to see the GIF above to see me do this in action!
Link to ESP32 Xiao with LEDs Tutorial!